Advanced Installation
In more complex environments, it may be necessary to add allow rules that take precedence over CautiousConnect’s implicit deny policy. This might be required if, for instance, the network administrator wishes to allow access to a good IPv6 host that resides within a block of IPv6 address space which CautiousConnect does not trust.
Once pfBlockerNG is installed in an operational pfsense deployment, you will setup the CautiousConnect feed as an “Alias” rule. Then, you can create a firewall rule that utilizes this alias. Other firewall rules may then be placed before or after the CautiousConnect blocking rule.
- To subscribe to the free CautiousConnect data feed, first register and signup:
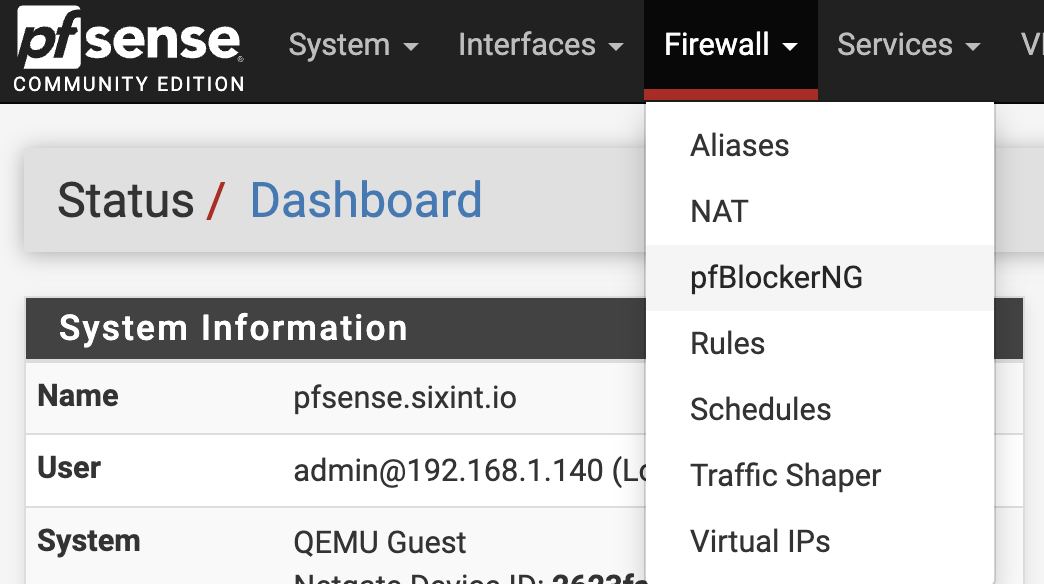
Next, setup the firewall to use CautiousConnect. Select the pfBlockerNG setup from the Firewall menu:
pfBlockerNG setup:

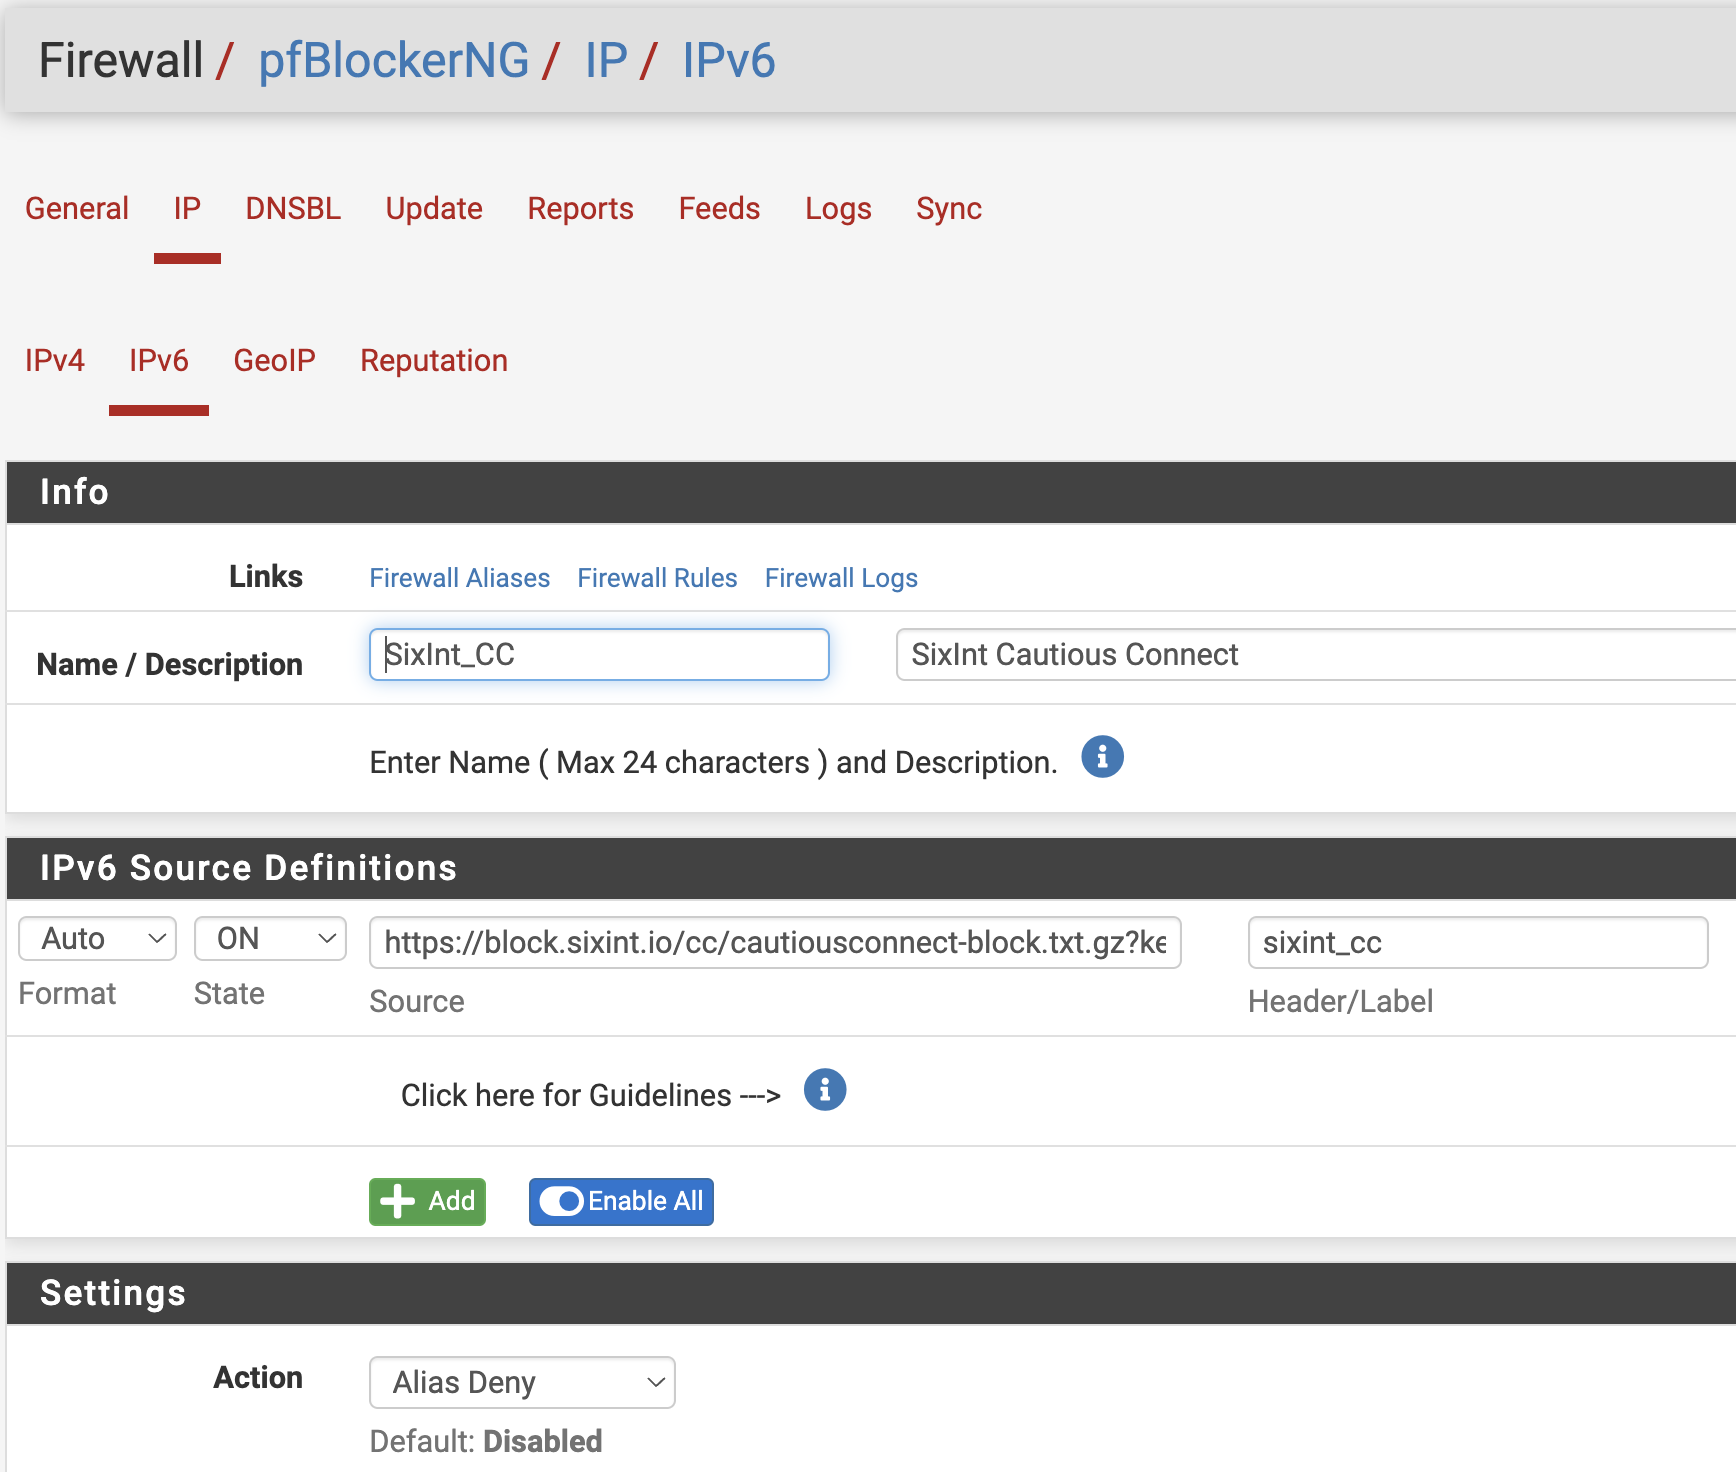
Select the IPv6 feed setup option from the IP menu on the main pfBlockerNG setup page.
Feed Configuration:

Enter a feed name and description, e.g., “SixInt_CC” and “SixInt CautiousConnect”
Enter the URL for the CautiousConnect feed, and replace “XXX” with your registered key
Toggle the State to “ON”
Select “Alias Deny” for the Action setting
Click “Save IPv6 Settings”
Select the Rules setup option from the pfSense Firewall dropdown menu. Click on the “LAN” tab and then the “Add” button.
Rule Configuration:

Set the action to “Reject”
Set the destination type to “Singe host or alias” and the alias to “pfB_SixInt_CC_v6”
Click “Save”
The new CautiousConnect rule, that is tied to the CautiousConnect alias, will appear in the list of LAN firewall rules. In the following example, there is an addition rule that allows HTTPS traffic to the IPv6 prefix 2001:470::/32. This rule is matched before CautiousConnect rules are considered, i.e., the manually installed rule can take precedence over CautiousConnect.
Rule with exception

That’s it, done! View blocked connections on the main page of the firewall, or through the pfBlockerNG logs.